Coins
In this example you will learn:
- How to import a project.
- How to use the different settings and add a mask to a material.
- How to manipulate a scene by placing objects and the camera.
Set up the Authentica Main Data Folder
- Open Authentica Creator.
- If you open it the first time, accept the license agreement. If you want to use the demo version (valid for 30 days) click Later. If you have purchased a license enter the license key.
- In the next dialogue you can set the Authentica main data folder which will contain all projects you create.
- For this example we place the main data folder in ".../Users/YourUsername" and name it "Authentica".
Download and Import Project
- Download the zip archive Example_1.zip and unpack it.
- The zip archive contains an Authentica project folder named "Coins_Demo" and a folder named "Masks".
- To import this project, go to the Scene tab, click Import Project and choose the "Coins_Demo" project folder.
- You can create a new project and set the active project by clicking on the
 icon in the lower left corner of Authentica Creator.
Overview of the Scene tab
- On the left hand side of Authentica Creator you can see the project folder structure. A project folder always contains 3 subfolders named "Materials", "Objects" and "Scenes".
- Since we have only one object in the scene which contains only one material, each of the folders contain only one entry named "Coins".
- Click on the scene "Coins" in the project folder viewer and open it.
- On the right side you find setting panels for the scene like the lights, objects, camera, background and physics settings.

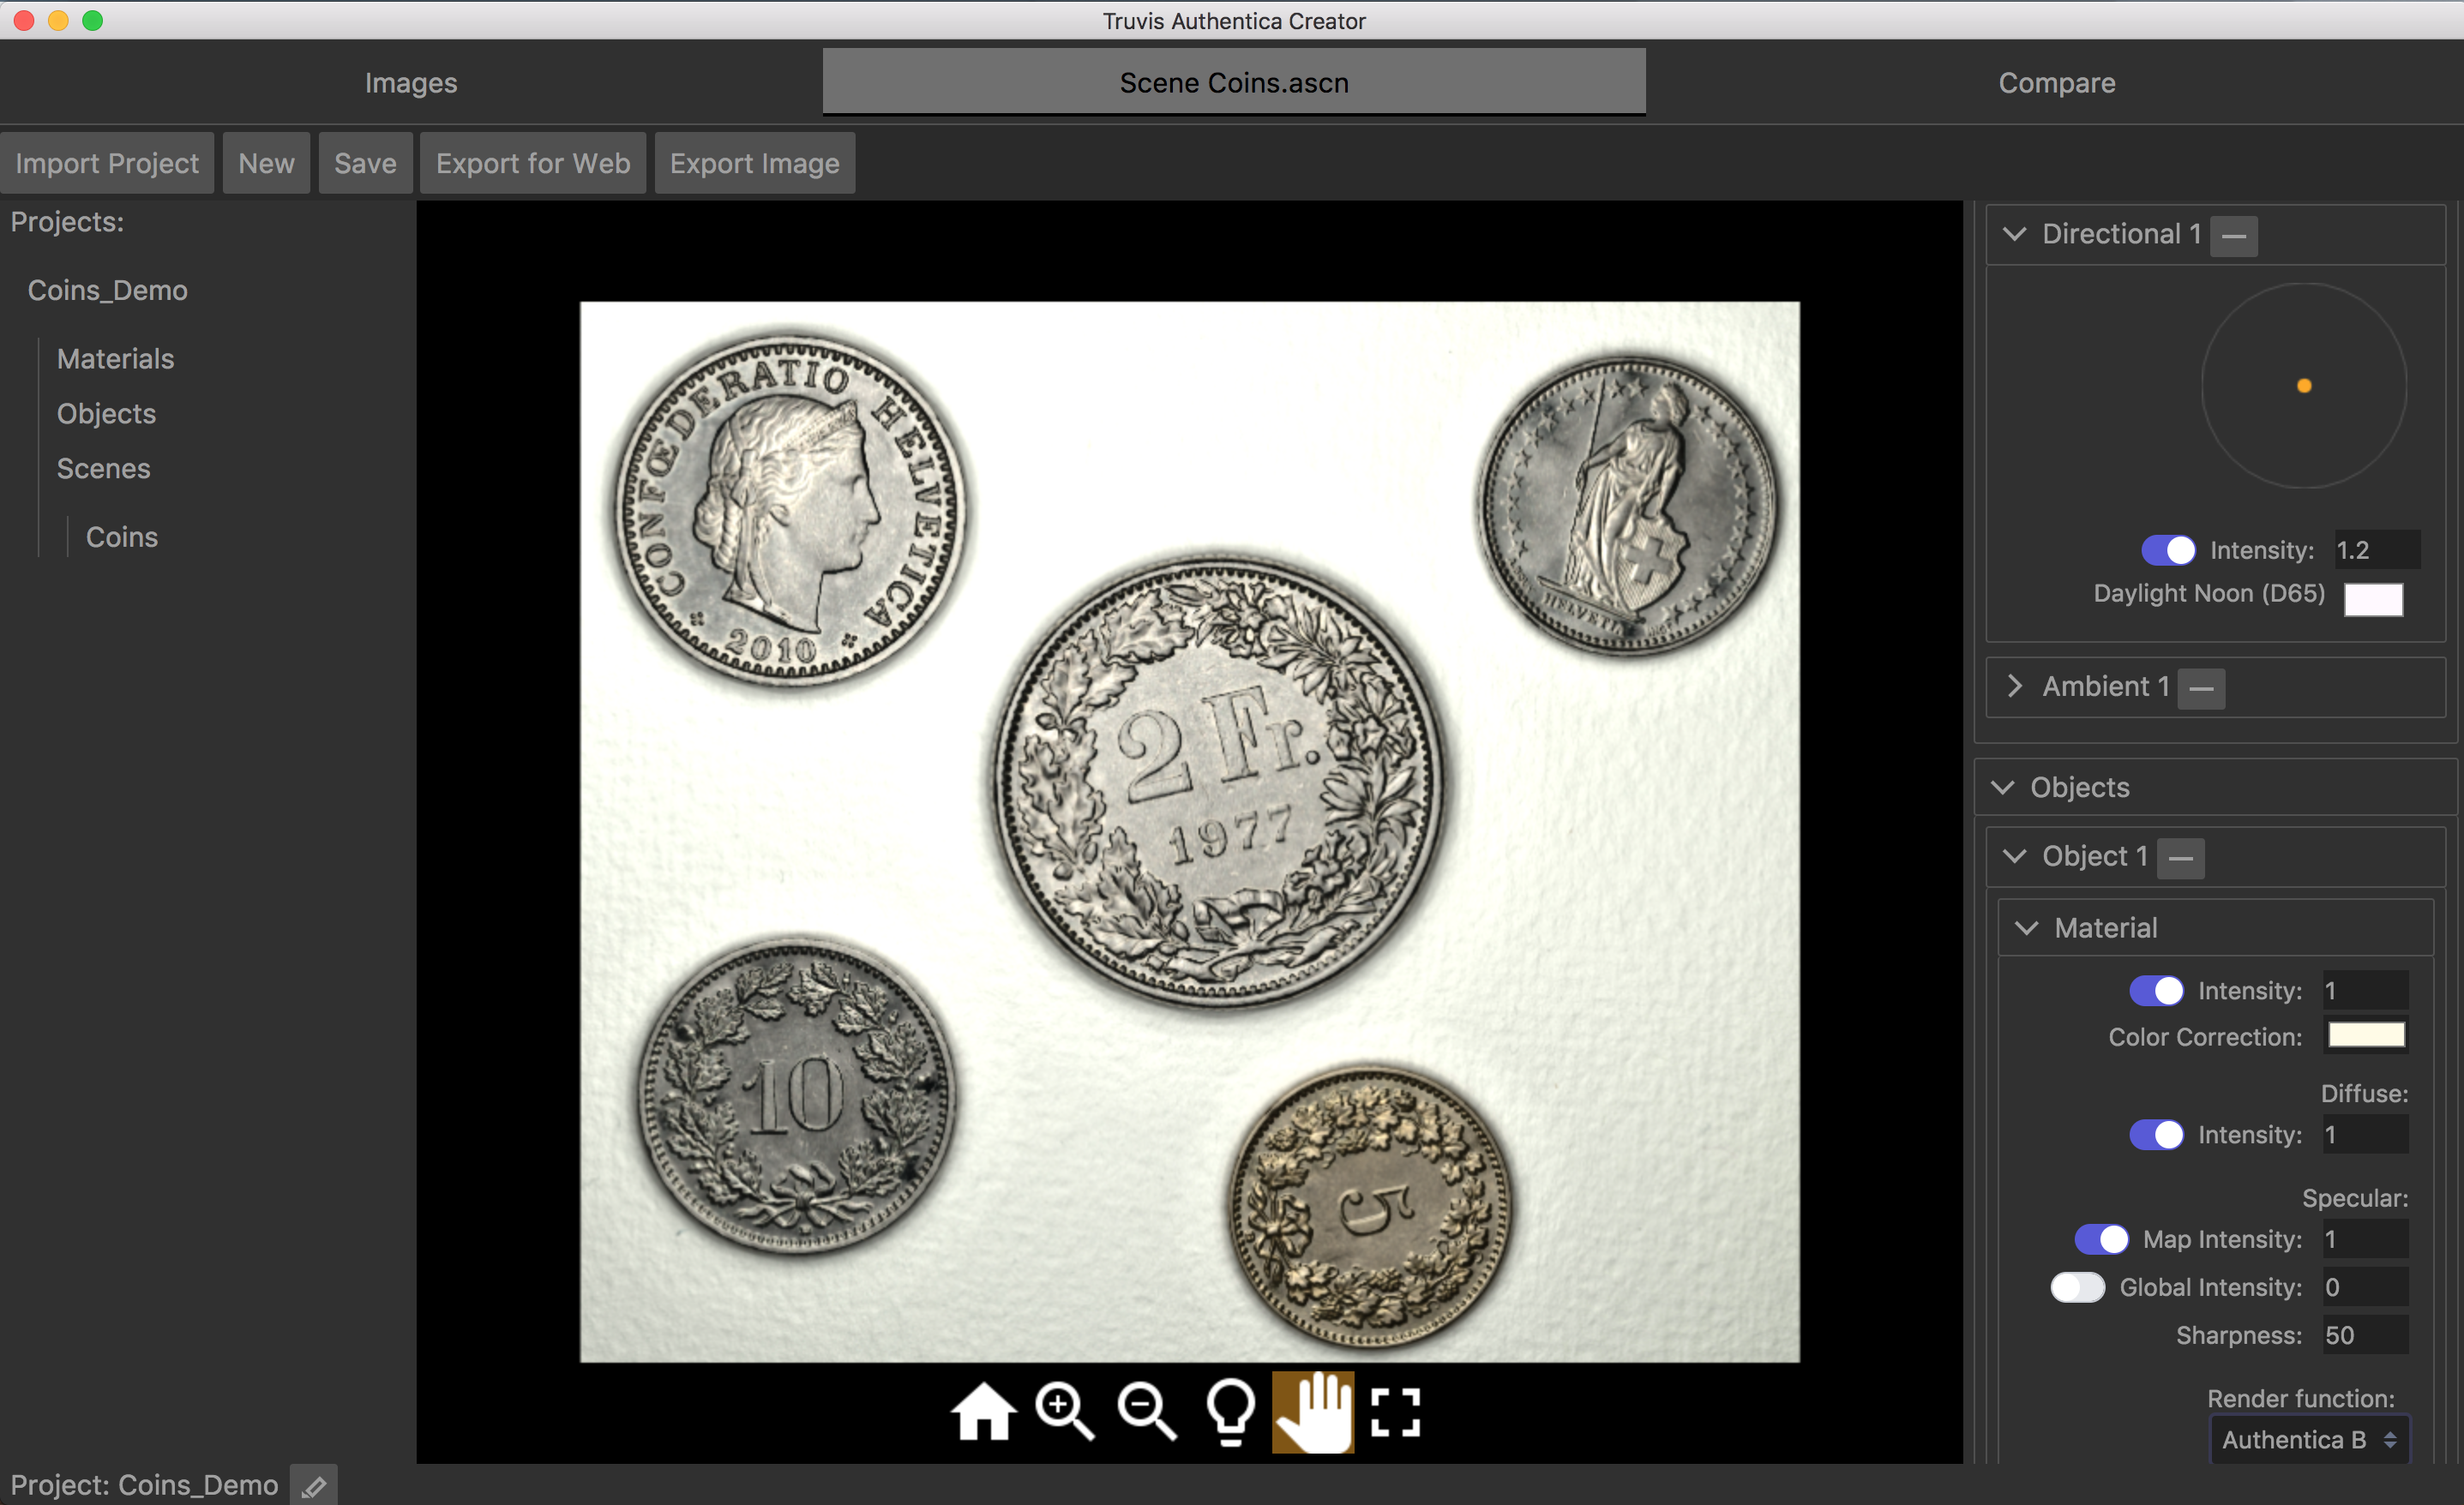
Light and Material Settings
- To see the effect of a moving light source, expand the light settings panel, click in the circle next to the directional light "Directional 1" and drag the yellow dot (indicating the light position) around. Alternatively, click the
 button in the viewer area and change the light direction by dragging in the viewer area.
 - Remove the pure white directional light and replace it with a standard light source. Click - next to "Directional 1" to remove it. To add a new directional light click the + button at the top of the light settings panel and choose
DirectionalDaylight Noon D65in the following dialogue. Increase the Intensity to 1.2 by entering the number directly or scrolling in the corresponding field. - You can also use light sources with customized light color. Click on the color field of the light source to access different color setting options.
- Other light sources are removed, added and edited in the same way.
- Go to the material settings panel within the object settings panel. The intensity, color and reflection properties of the material can be adjusted here.
- For this example we leave the intensity at 1 but correct the color of the material using the HSB sliders and setting the values to H: 50°, S: 10%, B: 100%. Like this the color of the coins is closer to their real color.
- For this example we use Authentica B as the render function.
- For more information on the different reflection settings see this section of the user manual.
- Click Save to save the scene.
Add Objects to a Scene and Apply Masks
- Lets assume we would like to create a scene which contains only the 2 franc and the 5 cent coin nicely aligned on a white background.
- For this we first have to add a second object to our scene. Click on the entry "Coins" in the "Objects" subfolder and click Add in the following dialogue.
- You won't see any difference in the scene since we just added the same object at the same position again. If you look at the object settings panel you will notice there are now two objects.
- Apply the same material settings of "Object 1" to "Object 2".
- To convince yourself that there are now two objects in the scene, change the position of one of the objects in the geometry settings. Also notice, that the object "Object 2" which was added to the scene later is placed in front of the object "Object 1" which was already in the scene.
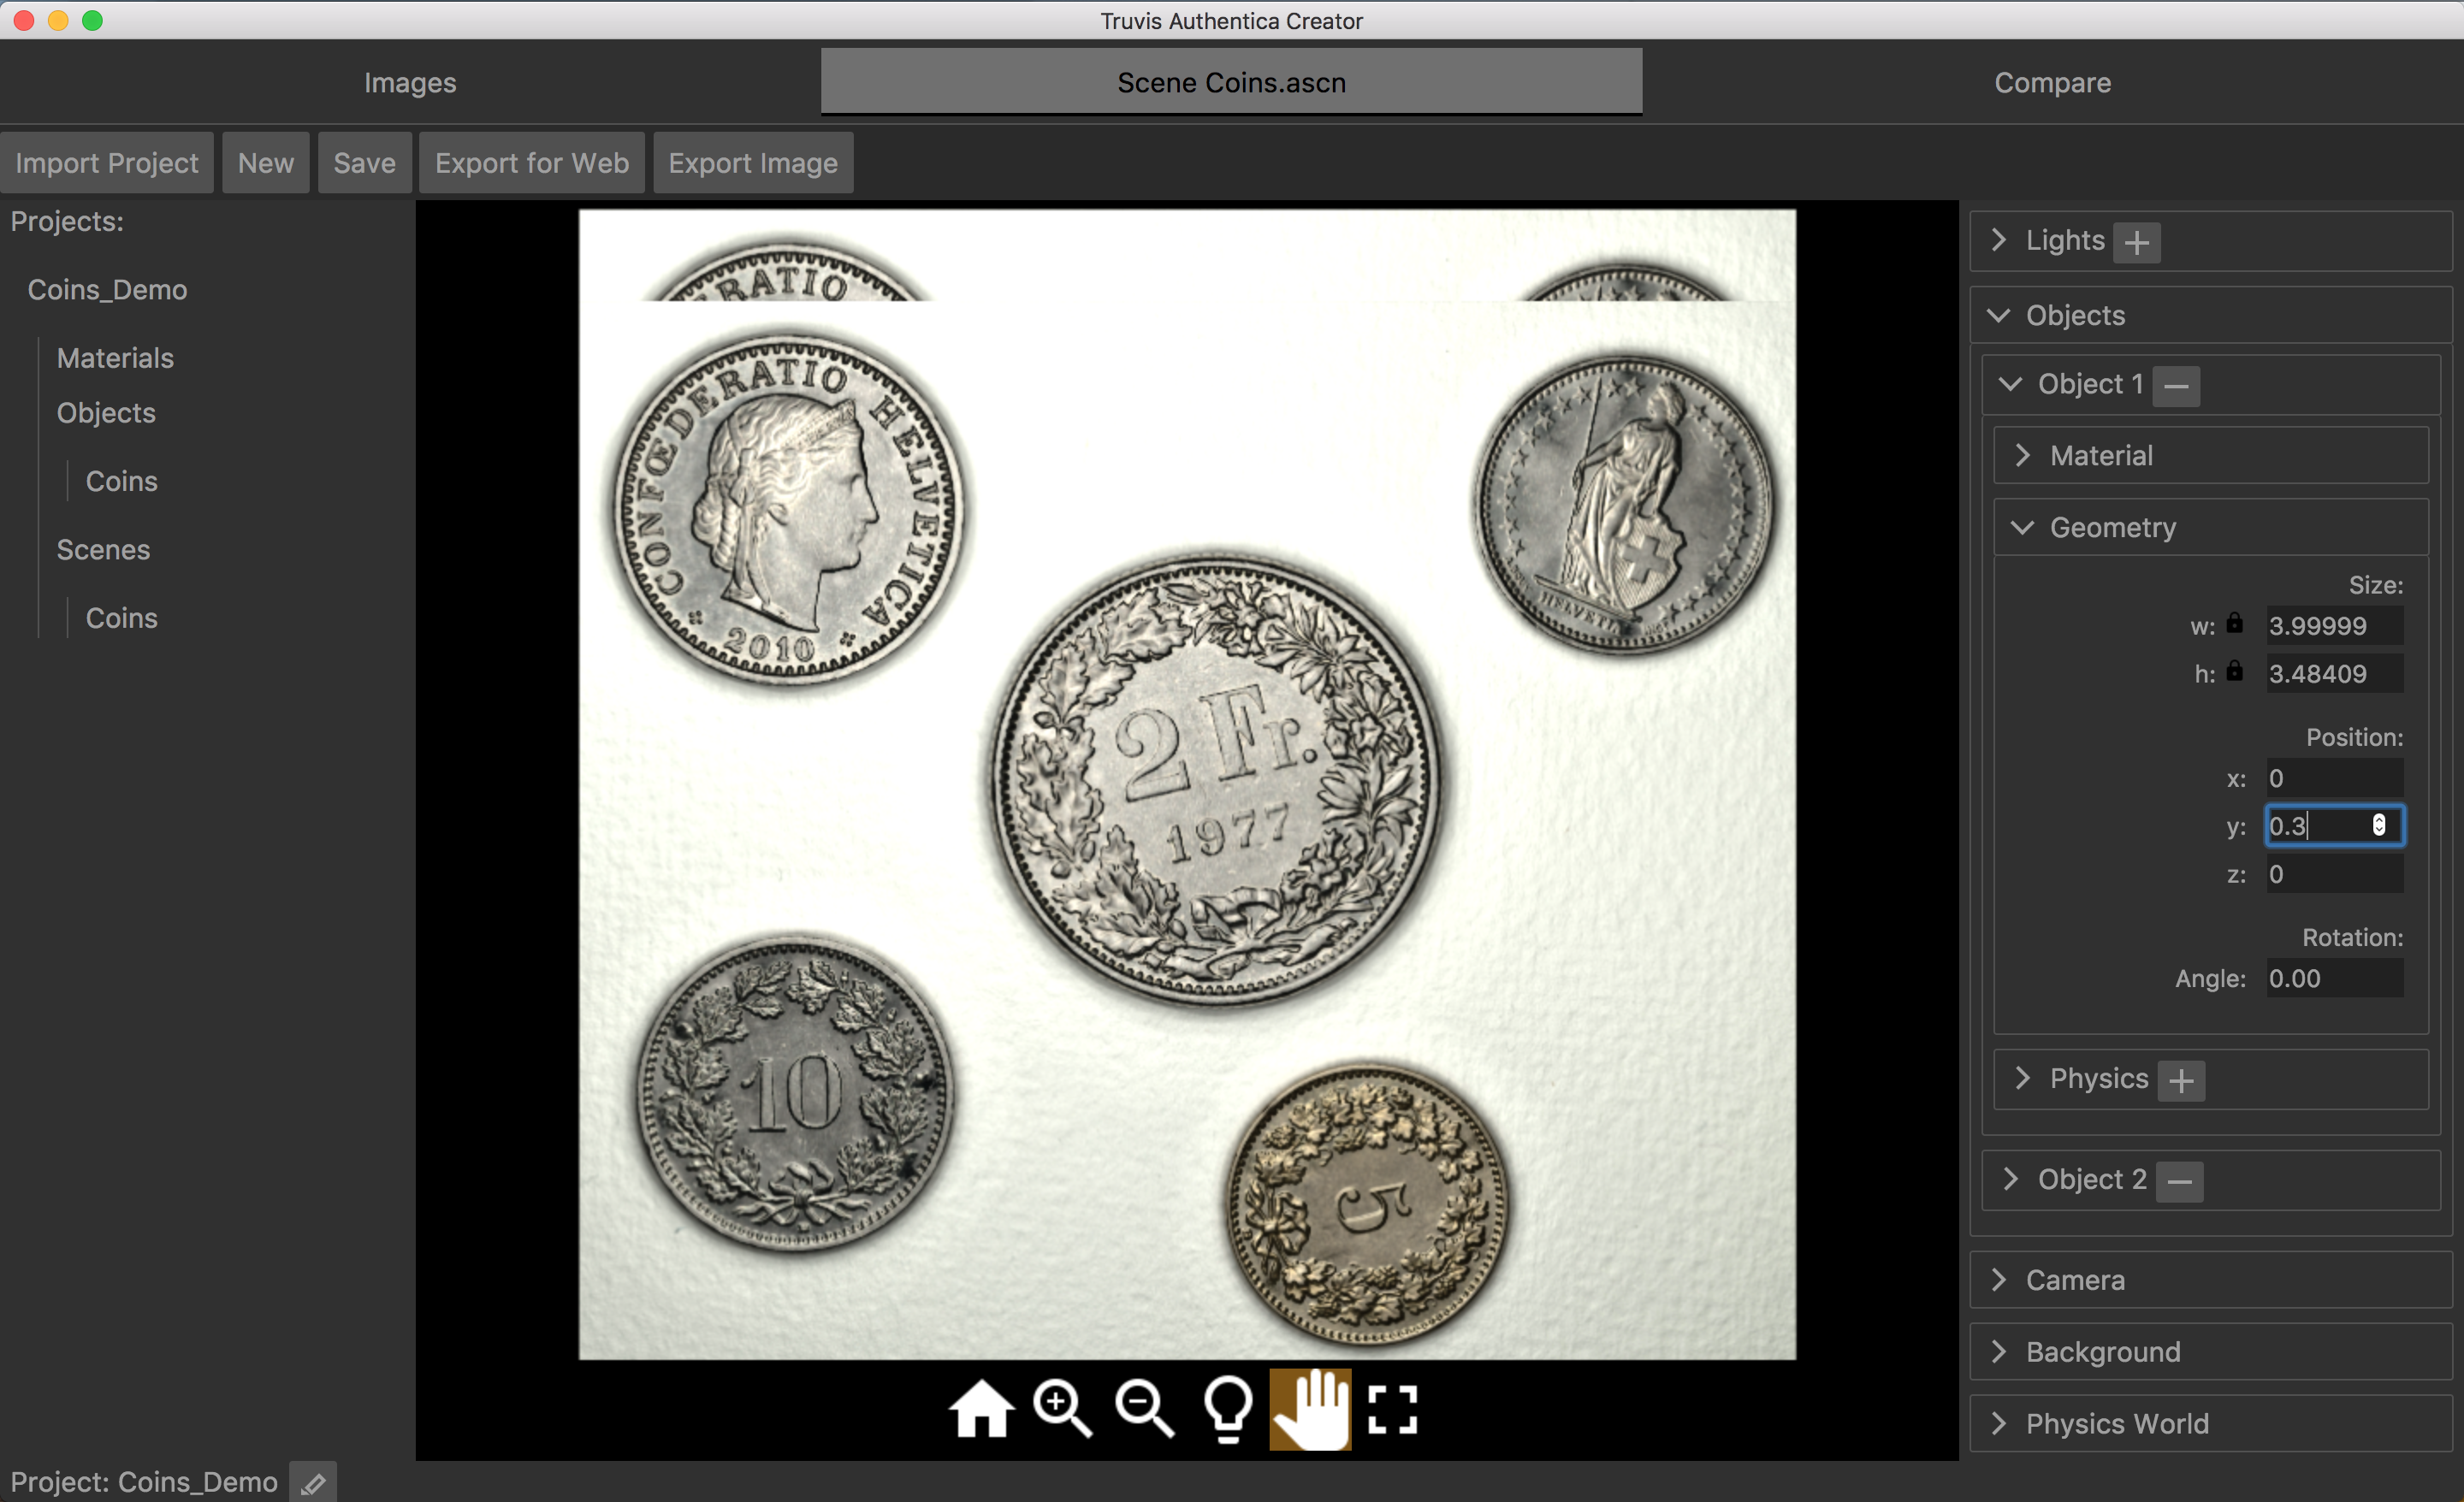
- Now we would like to cut everything from "Object 1" except the 2 franc coin. For this we have to add a mask. Just click the + button at the bottom of the material settings of this object and choose the file ".../Example_1/Masks/mask_2franc.tif".
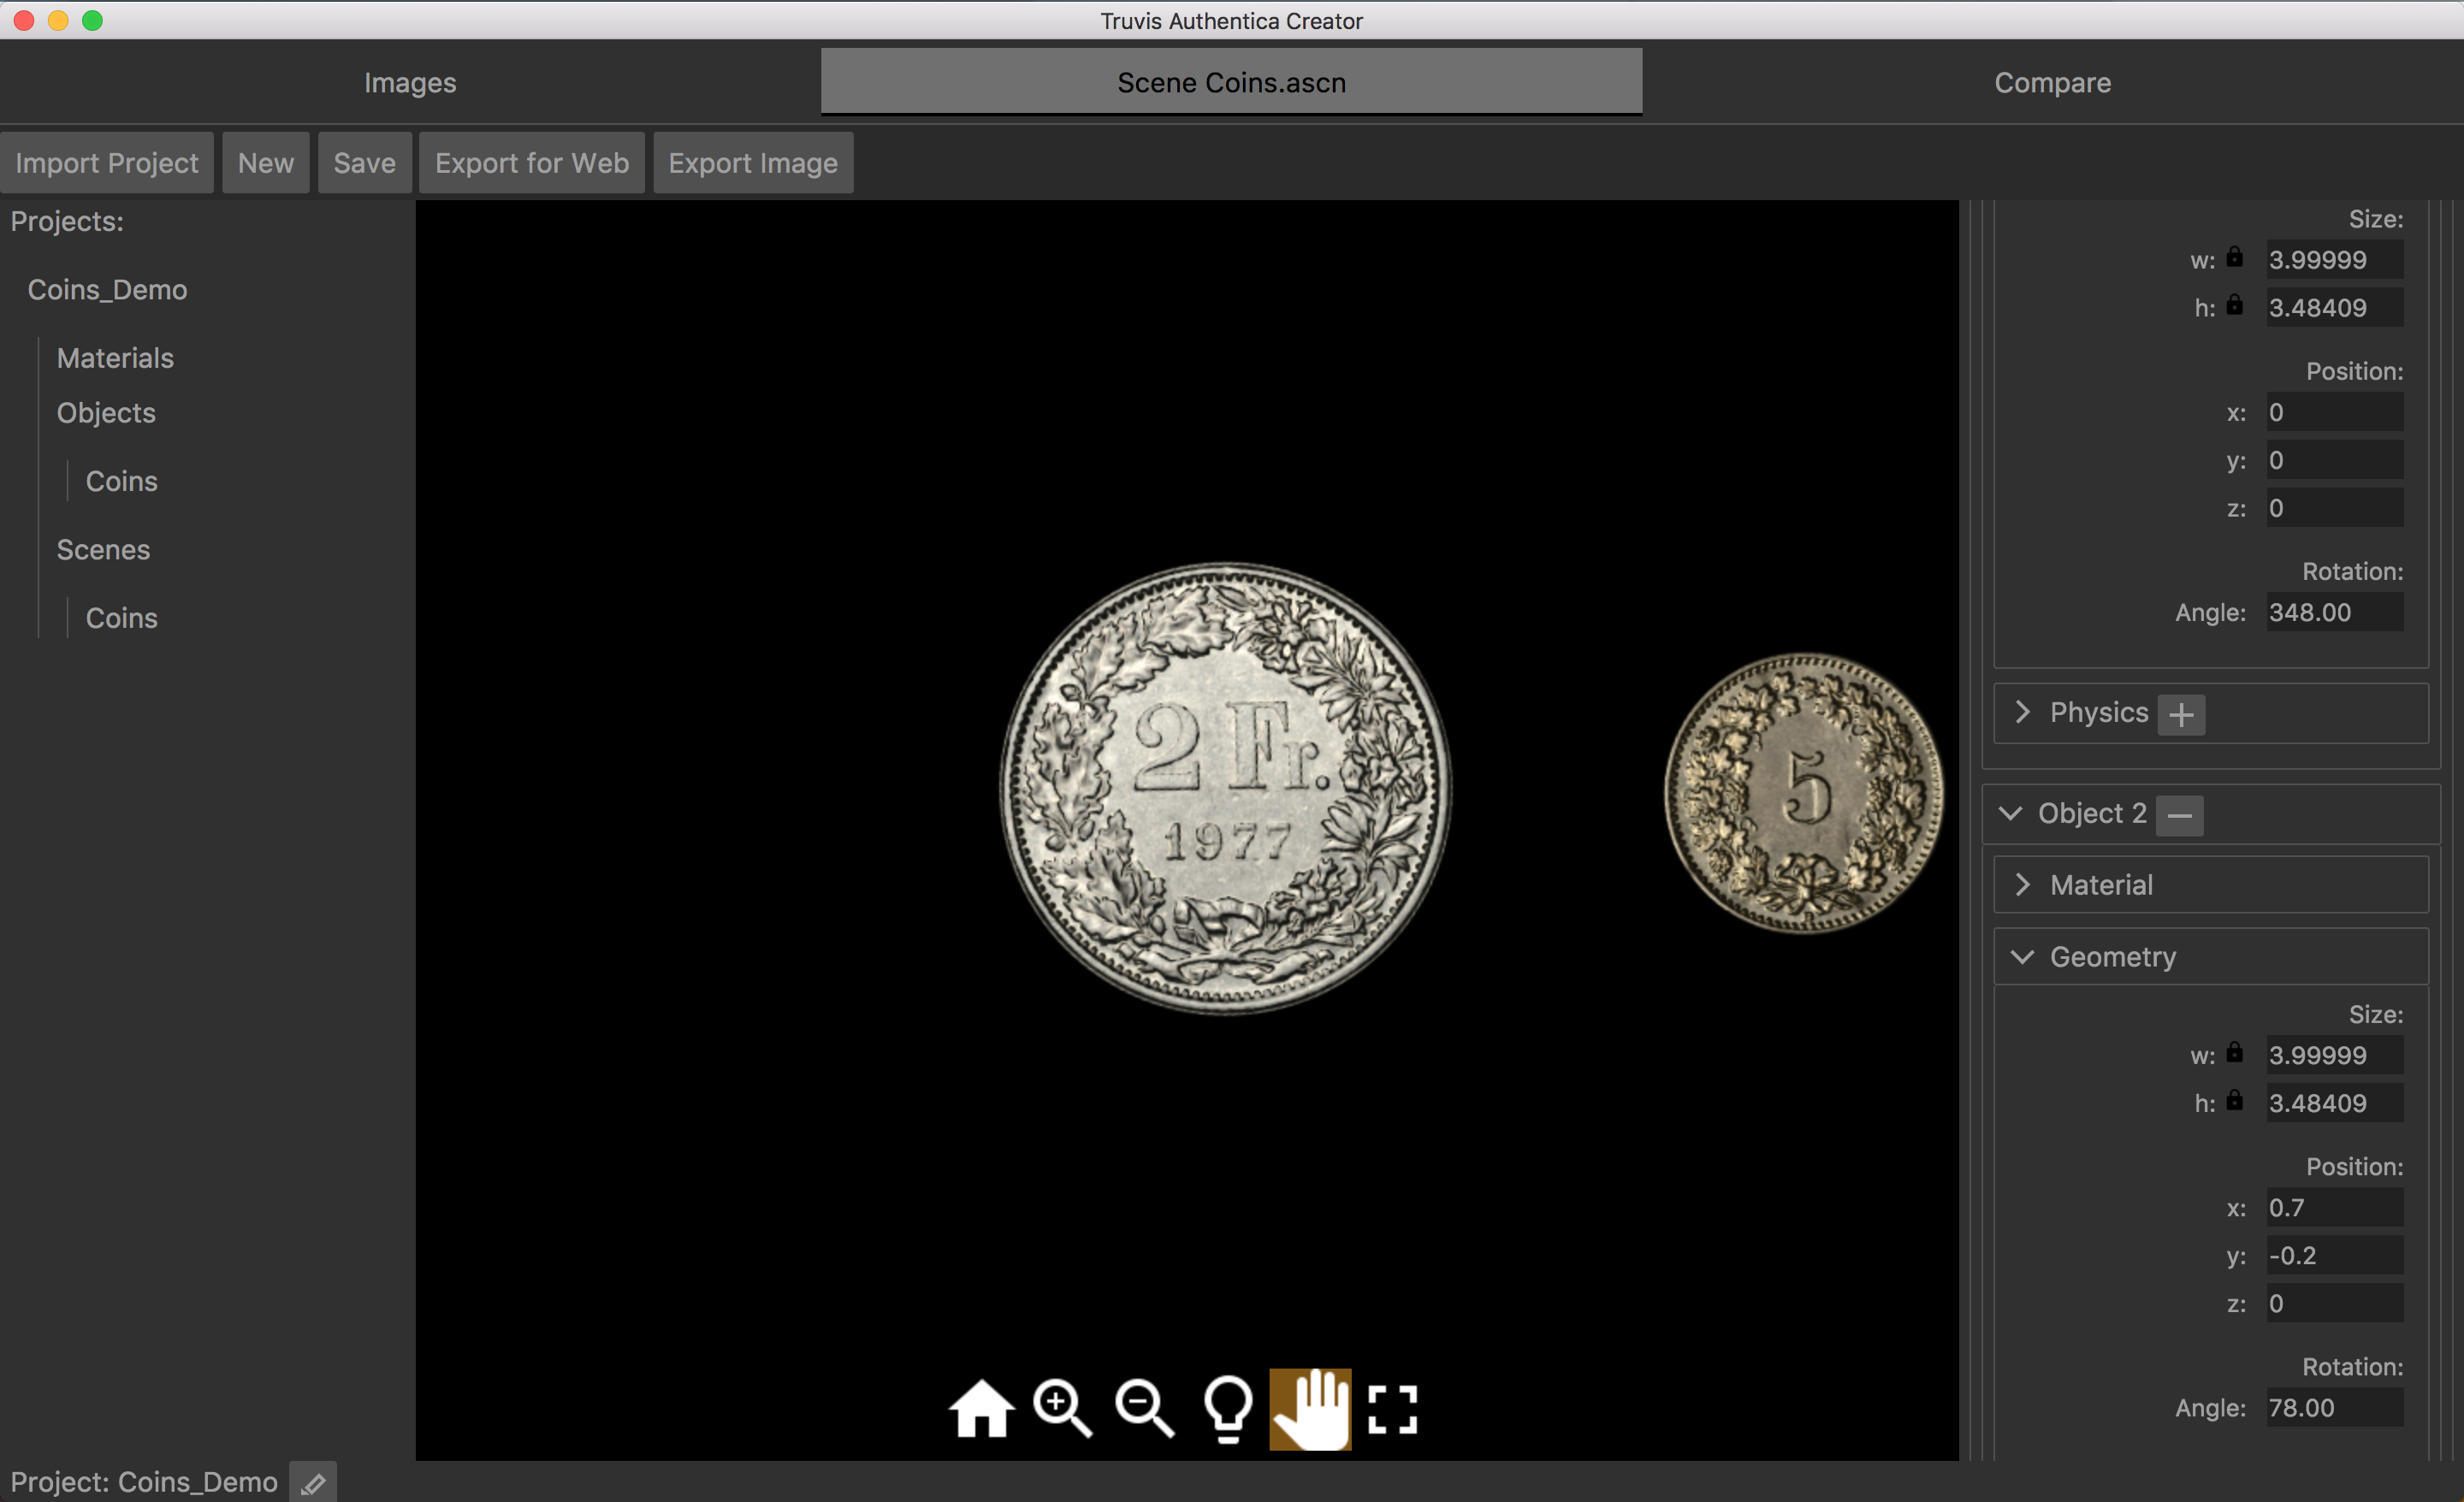
- The same procedure is repeated for the "Object 2" using the file ".../Example_1/Masks/mask_5cent.tif" as a mask. You should now have a scene that looks like this:
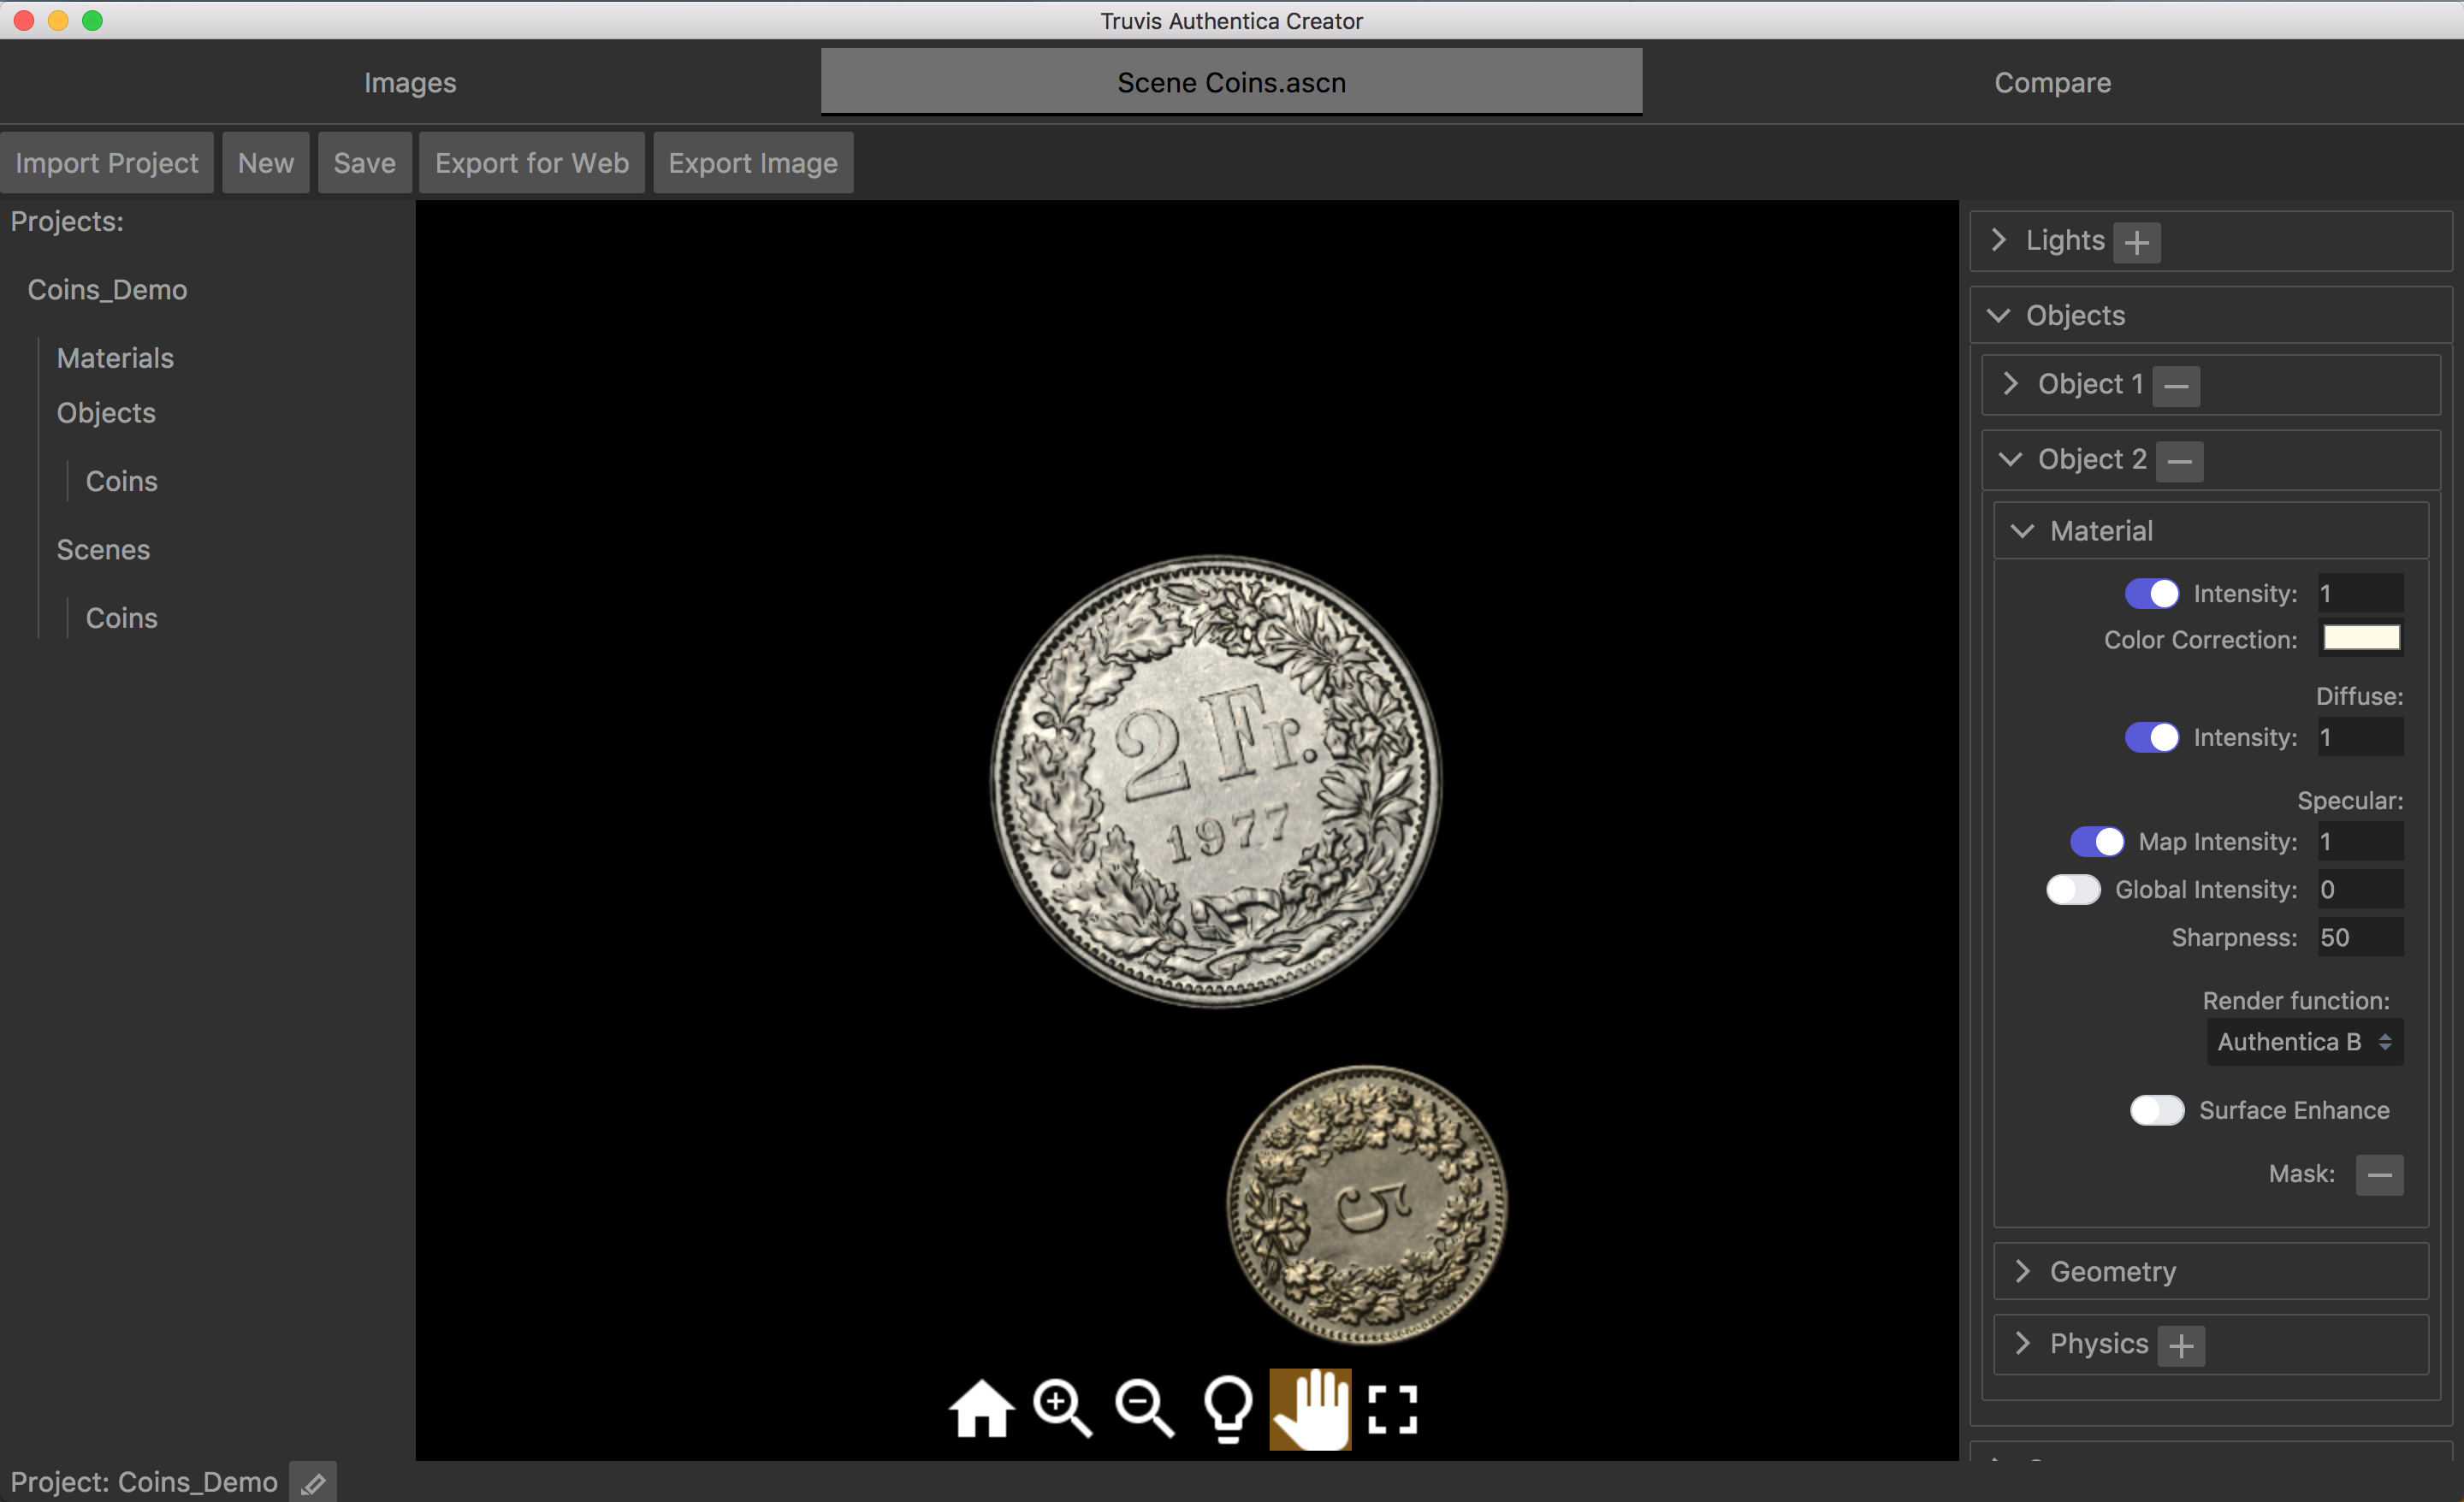
- For more details on how to generate a mask see this section in the User Manual.
Arrange Objects in a Scene
- For the 2 franc coin choose a rotation of 348 in the geometry settings of "Object 1".
- For the 5 cent coin choose a rotation of 78, set the x-value to 0.7 and the y-value to -0.2 in the geometry settings of "Object 2".
- The 5 cent coin should now be placed upright just next to the 2 franc coin.
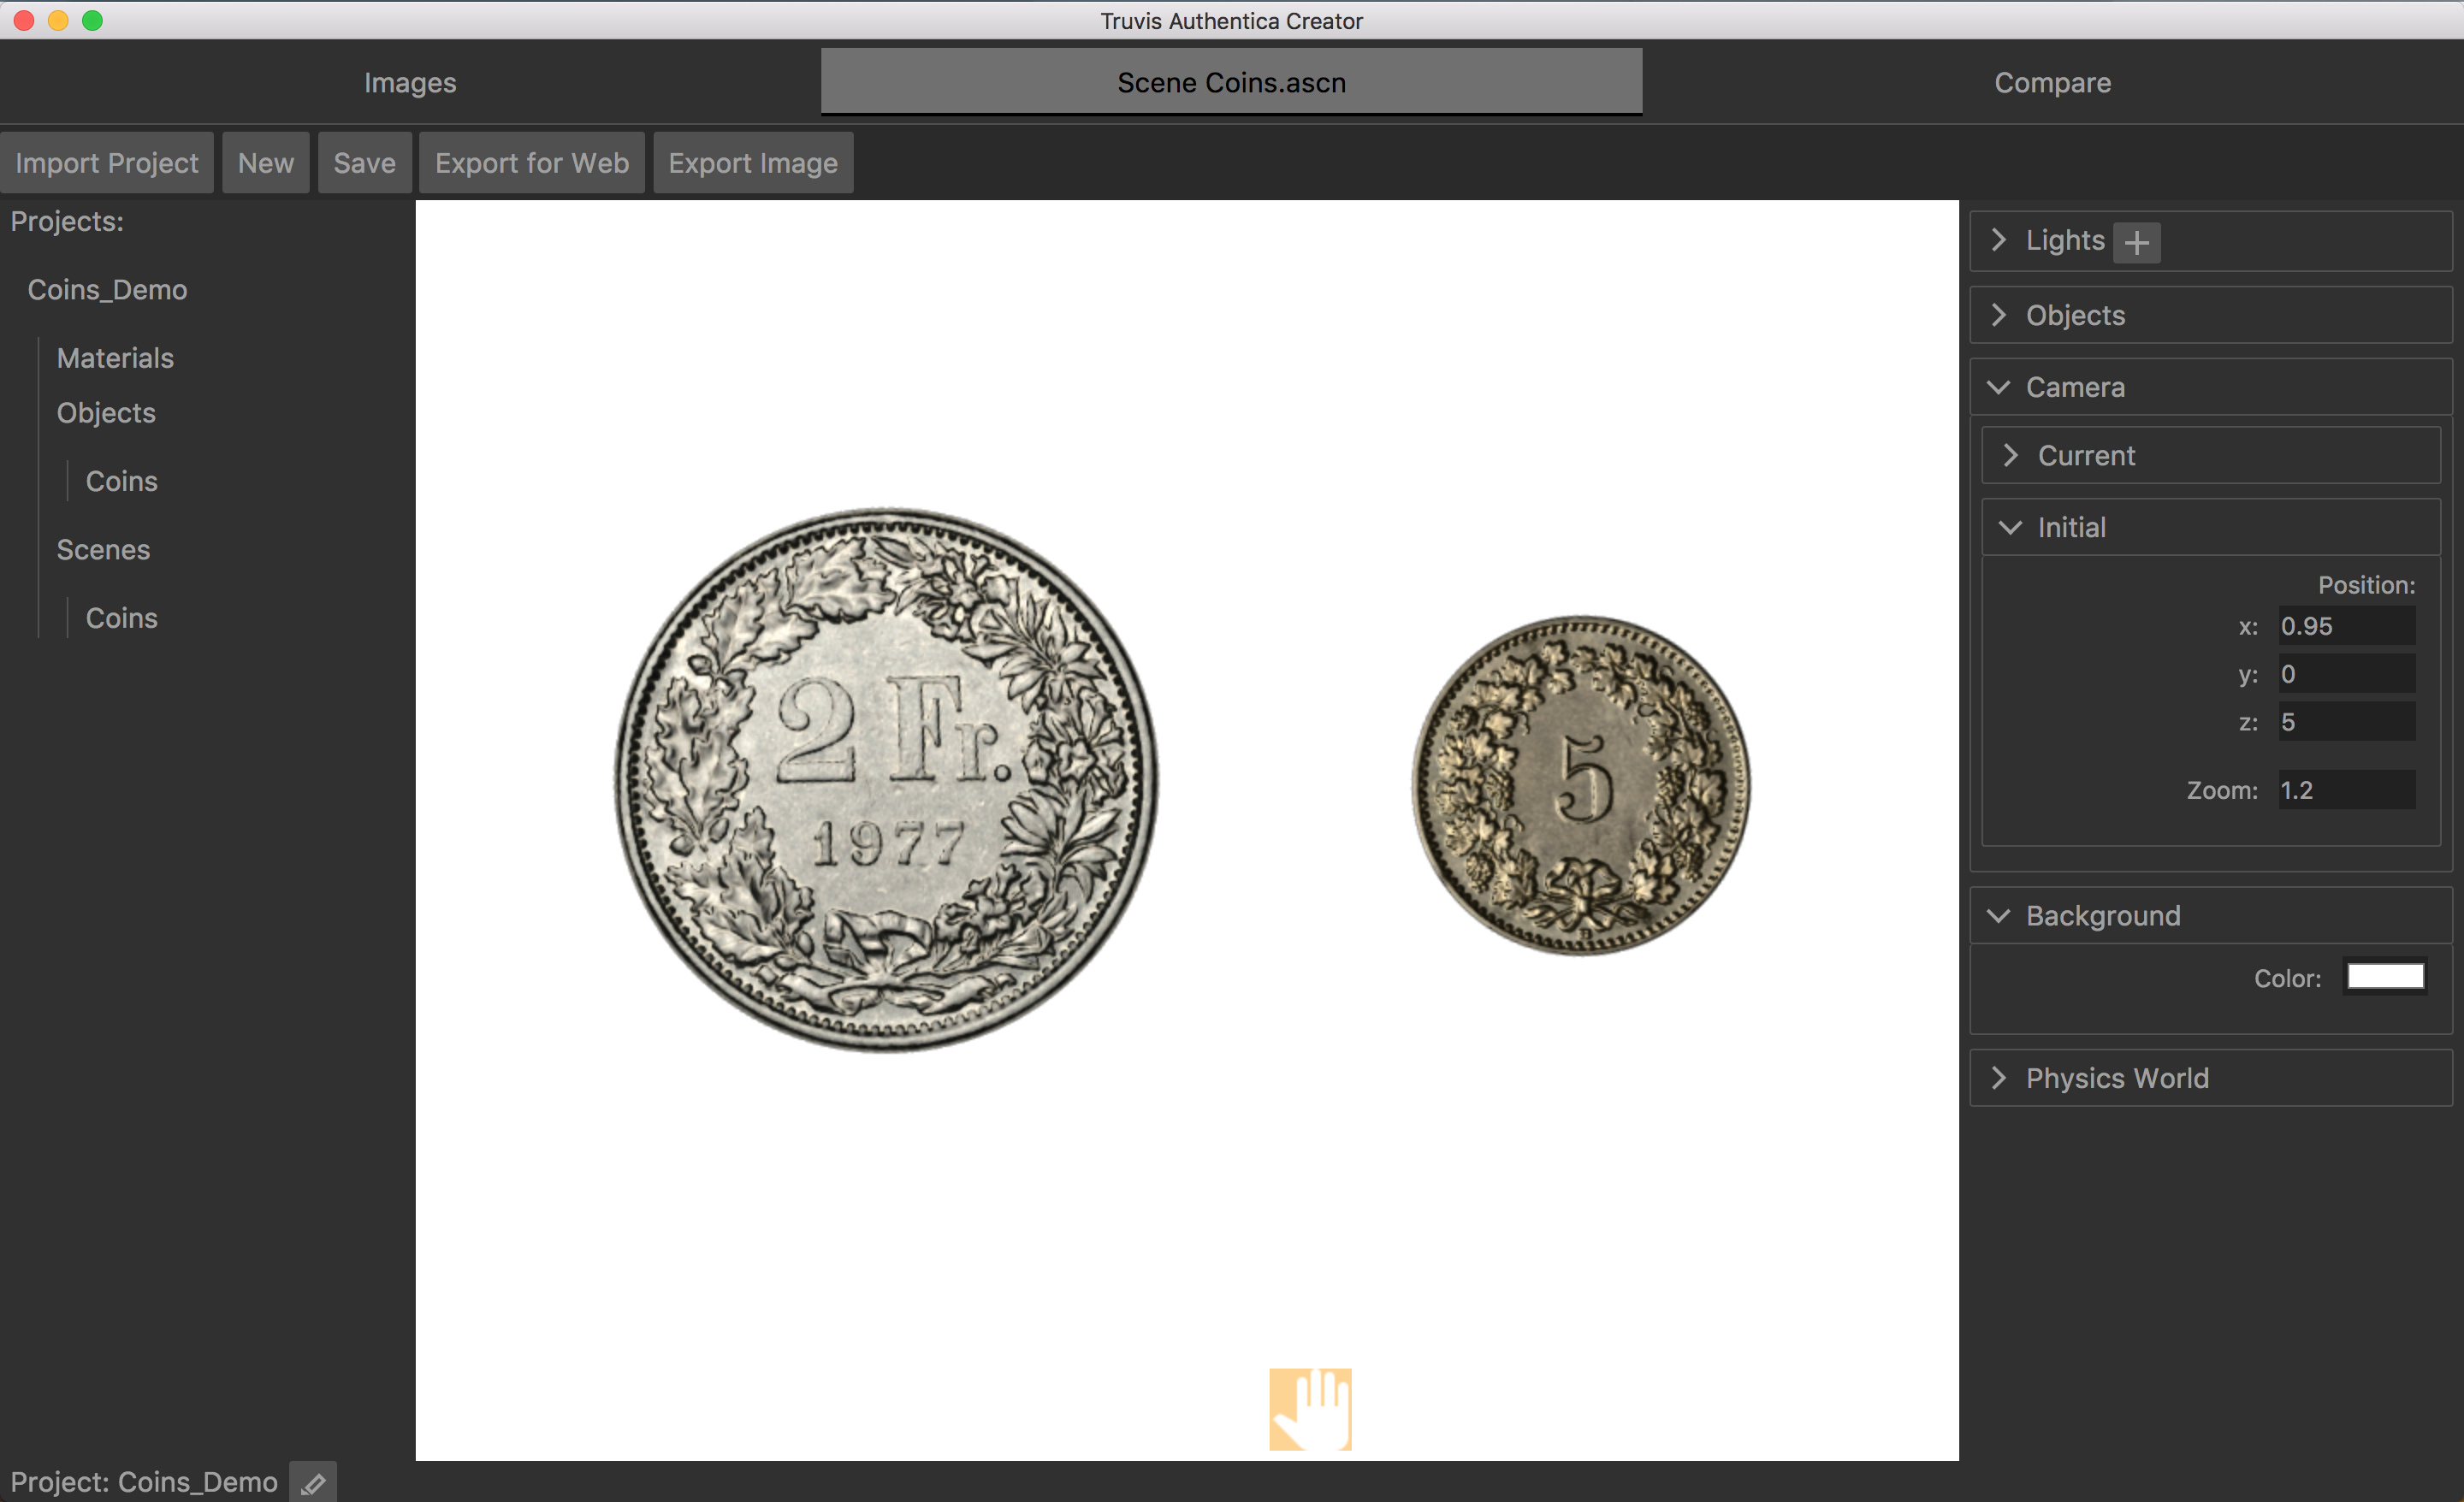
Change the Initial Camera Setup and Background Color
- As a last step we would now like the two coins to be nicely centered in the viewer area. Of course we could achieve this by simply changing their position in the geometry settings of each object. But the easier way to do this would be to change the initial position of the camera through which the scene is viewed.
- To change the initial position of the camera go to the camera settings and choose the appropriate position. For this example a x-value of 0.95 and a zoom of 1.2 places the coins well sized and nicely centered in the viewer area.
- Click the
 icon in the viewer area to see the changes of the initial camera position.
 - To change the background color click expand the background settings panel and click on the color field to set the background color to white.